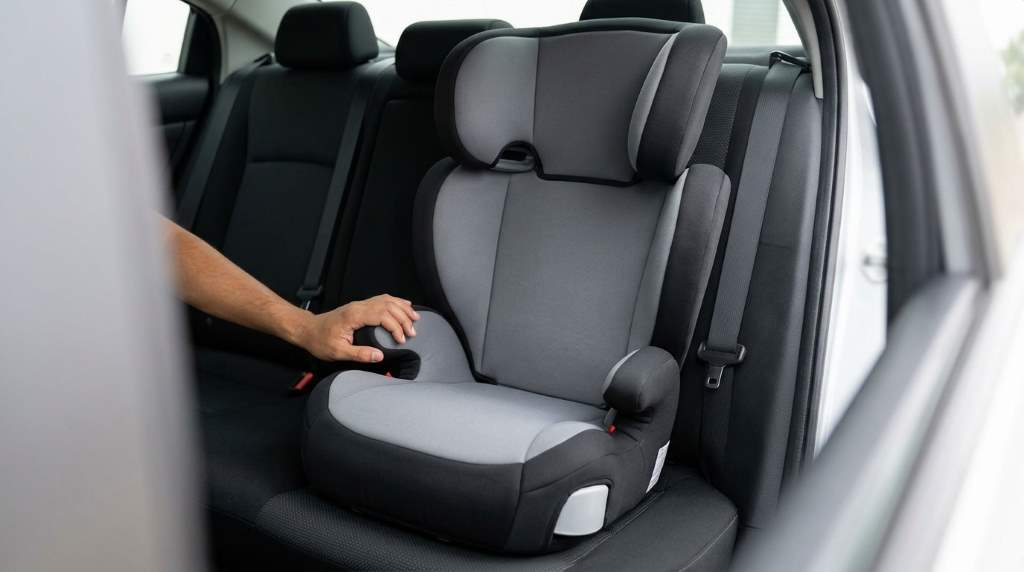
To install the Graco TurboBooster 2.0, position it forward-facing and secure its LATCH connectors if equipped. Then route the vehicle lap and shoulder belt correctly around your child before every trip. The graco turbobooster 2.0 car seat works as a belt-positioning booster, not a harnessed seat. Proper booster use can reduce serious injury risk by 45% for children ages 4 to 8. However, studies estimate that 46% of car seats and boosters get used incorrectly. Therefore, installation and belt positioning deserve equal attention.
Key Takeaways
- Check your child’s size and the exact booster model before installation.
- Place the booster forward-facing on an approved vehicle seating position.
- Use LATCH when your model provides it and your vehicle permits its use.
- Always restrain the child with the vehicle lap and shoulder belt.
- Keep the lap belt low across the upper thighs, not the abdomen.
- Position the shoulder belt across the shoulder and chest.
- Complete a final fit check before every journey.
Start With the Correct Booster Setup
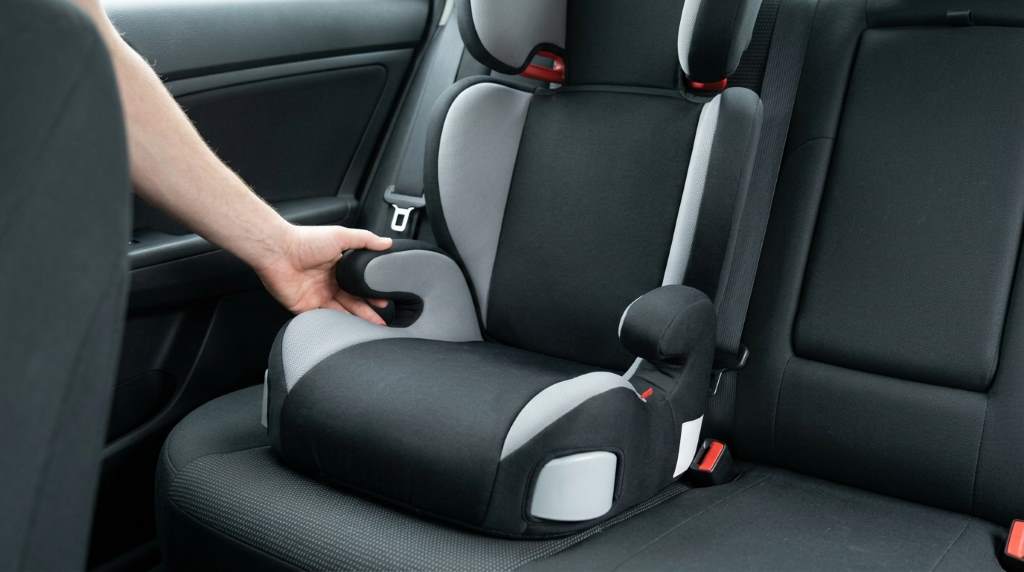
Before installing anything, identify which TurboBooster 2.0 version you own. Graco sells closely related versions, including highback and backless configurations. Specifications can differ between individual models, so use the labels and manual supplied with your seat.
The TurboBooster 2.0 LX highback model supports children from 40 to 100 pounds and 43 to 57 inches. It also requires the child to meet the manufacturer’s minimum age requirement. Always prioritize the instructions attached to your specific model.
Next, inspect the booster for damage, missing components, or loose hardware. Do not install a seat if important parts appear damaged or unavailable. Also check your vehicle owner’s manual for approved seating positions and anchor locations.
Prepare These Items First
- Graco TurboBooster 2.0 and its original components.
- Your vehicle owner’s manual for seating and anchor information.
- The Graco instruction manual for your exact model.
- An accessible vehicle lap and shoulder belt.
- Lower anchors if your booster and vehicle support them.
Choose the Right Vehicle Seating Position
The rear seat usually provides the most appropriate location for a booster. However, your vehicle manual determines which seating positions permit booster use. Never assume that every seating position works identically.
Choose a position with a compatible lap and shoulder belt. Avoid any position equipped only with a lap belt. A booster cannot properly position a child when the vehicle lacks the required shoulder belt.
Also check the vehicle seat shape before installation. The booster base should sit as flat as reasonably possible against the vehicle seat. Remove bulky cushions or aftermarket accessories that interfere with proper contact.
Install the Highback TurboBooster 2.0
The highback configuration provides back and head support while positioning the vehicle belt. Start by assembling the booster exactly according to your model’s instructions. Some versions require adult assembly before you place the booster inside the vehicle.
Step 1: Position the Booster
Place the assembled booster forward-facing on the vehicle’s rear seat. Center it on the selected seating position whenever practical. Make sure the base rests as flat as possible without forcing the booster into an unusual angle.
Keep the booster aligned with the vehicle seat rather than twisting it toward the door. Check that surrounding hardware does not interfere with the booster. A stable, properly aligned starting position makes every later step easier.
Step 2: Extend the LATCH Straps
If your TurboBooster 2.0 includes LATCH, locate the lower anchor connectors near the base. Extend both straps enough to reach your vehicle’s lower anchors. Avoid twisting either strap during this process.
LATCH helps secure the unoccupied booster and keeps it steady during everyday use. However, LATCH does not replace the vehicle seat belt that restrains your child. Your child must still use the vehicle lap and shoulder belt.
Step 3: Connect the Lower Anchors
Locate the vehicle’s lower anchor bars between the seat cushion and seatback. Attach each booster connector directly to its corresponding anchor. Confirm that each connector engages securely before tightening anything.
Do not attach a connector to an unrelated hook, seatbelt fitting, or cargo anchor. If the anchor location seems unclear, stop and consult the vehicle manual. Correct anchor identification prevents a simple installation mistake.
Step 4: Tighten the LATCH Straps
Push the booster toward the vehicle seat while pulling the adjustment straps to remove slack. Tighten both sides evenly so the booster sits securely. Avoid creating unnecessary tension that distorts the booster or vehicle seat.
After tightening, inspect both connectors and straps again. The straps should remain untwisted and properly attached. If the booster shifts unusually, review the installation instead of accepting the movement.
Step 5: Check the Headrest and Belt Guide
Adjust the highback head support to suit your child’s height. The shoulder belt should pass through the designated belt guide. Check that the guide does not force the belt against the child’s neck.
Have your child sit naturally against the booster back. Then adjust the head support until the shoulder belt reaches the correct position. Lock the head support into its designated adjustment position.
Secure Your Child With the Vehicle Seat Belt
This step matters more than simply making the booster feel secure. The vehicle’s lap and shoulder belt system restrains your child during normal driving and crashes. Therefore, correct belt routing should become part of every pre-trip check.
Position the Lap Belt Correctly
Buckle the vehicle lap and shoulder belt normally after your child sits fully against the booster. Route the lap portion in front of both armrests as instructed. Keep it low across the child’s upper thighs and hips.
Never allow the lap belt to ride across the stomach. A high lap belt can create dangerous loading during a crash. Reposition your child and belt whenever the belt moves upward.
Position the Shoulder Belt Correctly
Route the shoulder belt through the appropriate guide on the highback booster. The belt should cross the shoulder and chest rather than the neck or face. It should also remain comfortably positioned without falling off the shoulder.
Ask your child to sit normally while checking the belt. Do not judge the fit while the child leans forward or twists sideways. Proper posture gives you the most reliable belt-positioning check.
Confirm the Buckle Location
The buckle should remain accessible without forcing the belt into an unusual path. Make sure the lap portion stays correctly positioned after buckling. Your child should not place the shoulder belt behind the back or under an arm.
Teach older children why these rules matter instead of relying only on repeated reminders. A booster works properly when the child maintains correct belt positioning. Independence becomes safer when children understand the purpose behind each step.
How To Install the Backless Configuration
Some TurboBooster 2.0 versions convert into a backless booster as the child grows. Only convert your model if its instructions specifically allow that configuration. The backless setup still requires an appropriate vehicle seat and lap and shoulder belt.
Remove the Back Support
Follow your model’s instructions to recline and remove the back support. Do not force the back away from the base. If the components resist separation, review the manufacturer’s removal procedure.
Once removed, inspect the base before placing it inside the vehicle. Make sure no component remains loose or improperly attached. Keep removed parts stored safely when the model permits their removal.
Position and Secure the Base
Place the backless booster forward-facing on the vehicle seat. Keep the base flat and aligned with the seating position. If your version includes lower anchors, connect and tighten them according to its instructions.
Next, have your child sit upright with their back against the vehicle seat. Route the lap and shoulder belt through the appropriate positioning areas. The belt must provide proper fit without relying on the removed back support.
When Should You Use the Belt Positioning Clip?
Some TurboBooster models include a belt positioning clip for specific shoulder belt situations. Do not automatically attach the clip every time you install the booster. First check whether the shoulder belt already sits inside the manufacturer’s acceptable positioning zone.
If the belt falls outside the specified zone, follow your model’s instructions for attaching the clip. Attach it only where the manufacturer indicates. Incorrect clip placement can create another belt-positioning problem instead of solving one.
Common Graco TurboBooster 2.0 Installation Mistakes
Many installation problems happen after the basic setup appears complete. Therefore, perform a deliberate inspection instead of stopping after attaching LATCH. The following mistakes deserve particular attention.
- Using only the lap belt: The booster requires a lap and shoulder belt system.
- Using LATCH as the restraint: LATCH secures the booster, while the vehicle belt restrains the child.
- Routing the lap belt too high: Keep it low across the upper thighs and hips.
- Placing the shoulder belt incorrectly: Keep it across the shoulder and chest.
- Ignoring vehicle instructions: Confirm that your chosen seating position permits booster use.
- Allowing twisted straps: Straighten LATCH straps before tightening them.
- Skipping the final fit check: Recheck the child after buckling and sitting naturally.
A Practical Five-Point Final Check
Before driving, perform the same short inspection every time. A consistent routine helps catch errors that become easy to overlook. You can use this checklist until correct belt positioning becomes automatic.
- Confirm the booster faces forward and sits properly on the vehicle seat.
- Check that LATCH connectors attach correctly when your model uses them.
- Verify that the child sits upright against the appropriate support.
- Confirm that the lap belt lies low across the upper thighs.
- Confirm that the shoulder belt crosses the shoulder and chest correctly.
Then ask your child to remain seated normally for another moment. Watch for belt movement caused by leaning, twisting, or slouching. Correct the position before starting the vehicle.
What To Do If the Booster Feels Loose
A booster can move differently from a harnessed car seat, so avoid judging installation by movement alone. First confirm that you followed the LATCH tightening procedure correctly. Then check whether the vehicle seat itself moves or compresses under pressure.
If your model does not include LATCH, follow its belt-positioning instructions instead. The child still needs the vehicle lap and shoulder belt. When uncertainty remains, have the installation inspected by a certified child passenger safety technician.
How To Know When the Booster Still Fits
Children grow quickly, so installation does not end after the first successful setup. Recheck the child’s height, weight, and belt fit periodically. Also review your booster label whenever your child approaches its stated limits.
A child should remain in a booster until the vehicle belt fits correctly without assistance. The lap belt should stay low on the thighs, while the shoulder belt should cross the shoulder and chest. State laws can also impose requirements beyond the manufacturer’s minimum specifications.
Why Correct Belt Fit Matters More Than Appearance
A booster can look perfectly positioned while the belt still fits incorrectly. The goal is not simply to make the child sit higher. The goal is to position the vehicle belt where it can function as designed.
That distinction explains why LATCH alone cannot make the installation complete. LATCH keeps the booster stable, but the vehicle belt protects the child. Consequently, belt routing deserves the same attention as anchor attachment.
Quick Installation Reference
| Installation Area | Correct Approach | Avoid |
|---|---|---|
| Booster direction | Forward-facing | Rear-facing installation |
| Vehicle belt | Lap and shoulder belt | Lap-only belt |
| Lap belt | Low across upper thighs | Across the stomach |
| Shoulder belt | Across shoulder and chest | Behind back or under arm |
| LATCH | Connect and tighten correctly | Twisted or incorrectly attached straps |
| Child posture | Upright and properly positioned | Slouching or leaning sideways |
Frequently Asked Questions
Does the Graco TurboBooster 2.0 need LATCH?
No, LATCH availability depends on the model, while the child still requires the vehicle lap and shoulder belt.
Can I use the TurboBooster 2.0 with a lap-only belt?
No, the booster requires a vehicle seating position equipped with both lap and shoulder belts.
Does LATCH replace the vehicle seat belt?
No, LATCH secures the booster, while the vehicle seat belt restrains the child.
Can the TurboBooster 2.0 become a backless booster?
Yes, compatible 2-in-1 versions can convert to backless mode according to their specific instructions.
How should the shoulder belt sit on my child?
The shoulder belt should cross the shoulder and chest without touching the neck or slipping off the shoulder.
Final Safety Check Before You Drive
Installing the Graco TurboBooster 2.0 correctly requires more than attaching the booster to the vehicle. Start with the correct seating position, secure compatible LATCH connectors, and then focus carefully on belt fit. Most importantly, check the child’s position every time before driving.
Use your exact Graco manual and vehicle manual whenever their instructions address a model-specific or vehicle-specific detail. If you remain unsure, seek hands-on guidance from a certified child passenger safety technician. Taking a few extra minutes now can make every future installation more consistent and confident.