To change a poopy diaper, first lay your baby on a flat, secure surface and unfasten the dirty diaper. Clean your baby’s bottom thoroughly with baby wipes or a damp cloth, then apply diaper cream if needed.
Changing a baby’s poopy diaper is a task that every new parent must become skilled at, and quickly. It’s an essential part of infant care that ensures your baby stays clean and comfortable. Understanding the step-by-step process can help prevent diaper rash and maintain proper hygiene.
Mastering the diaper-changing routine becomes second nature with a bit of practice and the right supplies at hand. This guide is designed to provide newcomers with the confidence needed to tackle this seemingly daunting task with ease, ensuring the wellbeing and happiness of both the parent and the infant.
Gather Your Diapering Essentials
Embarking on the mission to change a poopy diaper? Make sure to have everything you need within arm’s reach for a smooth and mess-free experience. Proper preparation prevents poor performance, especially in the high-stakes world of diaper changing. Let’s dive into the must-have essentials for tackling this task like a pro.
Diapers, Wipes, Barrier Cream, And Clean Clothes
- Diapers: Have a few fresh diapers handy, just in case of accidents.
- Wipes: A generous stack to ensure a thorough cleanup.
- Barrier Cream: Protect your baby’s delicate skin and prevent rashes.
- Clean Clothes: A fresh set in case the current outfit gets soiled.
Disposable Bags For Soiled Items
Armed with disposable bags, cleanup and disposal become a breeze. Seal away the soiled diaper and clothes to contain the smell and mess.
Changing Pad Or Protective Layer For The Surface
Changing pads or protective layers safeguard the changing surface and provide a clean, soft space for your baby. It’s practical to use a waterproof pad or a disposable cover for easy cleaning post-diaper change.
Setting Up The Diapering Area
| Image | Product | Detail | Price |
|---|---|---|---|
 | Pampers Sensitive Baby Wipes |
| Check Today’s Price on Amazon |
 | Huggies Size 4 Diapers |
| Check Today’s Price on Amazon |
 | Luvs Platinum Protection Bluey Baby Diapers |
| Check Today’s Price on Amazon |
 | The Honest Company Clean Conscious Diapers |
| Check Today’s Price on Amazon |
 |
| Check Today’s Price on Amazon |
When it comes to changing a poopy diaper, preparation is key. Setting up the diapering area efficiently can turn a potentially messy situation into a streamlined, even pleasant, process. A well-arranged diapering station not only fosters safety and comfort but also reduces stress for both the baby and the caregiver. In this section, we’ll cover essential tips for creating the perfect diapering zone.
Choosing A Safe And Comfortable Spot
First and foremost, prioritize safety and comfort. An ideal location is a flat, stable surface at a comfortable height, which will prevent strain on your back. Ensure the spot is away from edges or potential hazards, and consider a changing table with raised sides for extra security. Comfort for your baby is equally important, so opt for a padded changing mat to keep them cozy and protected during the process.
Keeping Distractions At Bay For A Fuss-free Experience
Minimize fuss by keeping distractions to a minimum. A soft toy or mobile can keep your baby’s hands busy while you focus on the task. This proactive strategy leads to a calm diaper-changing routine. Be mindful to position distractions where they can’t be pulled down onto the baby, ensuring both safety and engagement.
How To Ensure Everything Is Within Arm’s Reach
- Baby wipes: For easy access and swift clean-ups.
- Diapers: Have a small stock at the ready to avoid mid-change retrieval.
- Diaper rash cream: To treat and prevent skin irritation.
- Disposable bags: For soiled diapers and wipes, reducing odor and maintaining hygiene.
- Changing pad liners: Spare liners ensure a quick changeover in case of accidents.
- Extra clothes: Because sometimes a diaper change can lead to a full outfit change.
Arranging these items in a caddy or on nearby shelves means you’ll never have to take your hand off your baby to reach for supplies. Remember to stock up after every change to ensure the diapering area is always prepared for the next round.
Quick & Stress-free Diaper Removal
Dealing with a poopy diaper can be a daunting task, but with the right approach, it doesn’t have to be a stress-inducing experience. Mastering a quick and efficient method keeps your baby comfortable and makes cleanup a breeze. Below, discover the seamless steps for a clean swap from a messy diaper to a fresh one, how to confine the mess and smell effectively, and tips for managing any curveballs that come your way during the process.
Steps For Safely Removing A Poopy Diaper
Ensuring a safe and hygienic diaper change is paramount. Follow these steps:
- Prepare the area: Lay out a changing mat and have wipes, a fresh diaper, and a disposal bag handy.
- Place the baby on the mat: Always keep one hand on your baby to prevent any rolling or falling off.
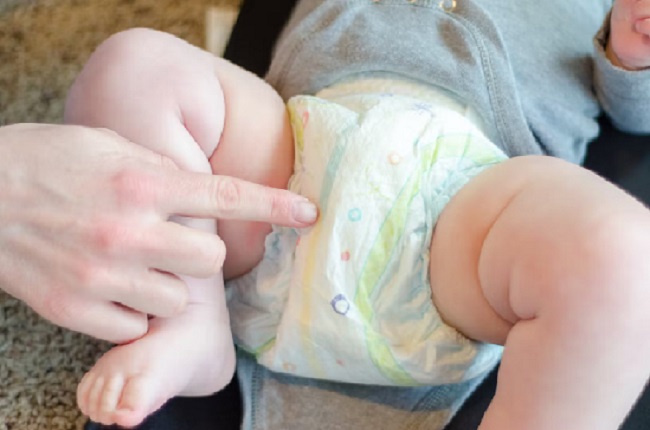
- Unfasten the diaper: Gently lift the baby’s legs by the ankles and pull the front of the diaper down.
- Clean the baby: Use the front half of the diaper to remove the bulk of the stool, then use wipes to clean the area thoroughly.
- Remove the diaper: Fold the soiled diaper inward, wrapping it up and securing it with the fasteners to contain the mess.
- Apply a fresh diaper: Slide it under the baby, bring the front up between their legs, and fasten it snugly.
- Wash your hands: Once the baby is safe and secure, ensure you wash your hands thoroughly to avoid contamination.
Minimizing Mess And Containing The Odor
Keep your environment clean and fresh with these strategies:
- Use a diaper disposal system: These are designed to seal in odor and are a great investment for any nursery.
- Neutralize the smell: Wipe down surfaces with vinegar followed by water to neutralize odors without harsh chemicals.
- Immediate disposal: Wrap up the soiled diaper tightly in a disposal bag and take it to the trash outside as soon as possible.
- Air purifier: Consider an air purifier with a HEPA filter to eliminate airborne particulates and odors.
Tackling Common Challenges During The Process
Every parent faces diaper challenges, but these tips can streamline the process:
| Challenge | Solution |
|---|---|
| Baby movement | Distract the baby with a toy or mobile to keep them still. |
| Diaper rash | Gently cleanse and thoroughly dry the area before applying a rash cream. |
| Leaks | Ensure the diaper is the right size and is fastened neither too tight nor too loose. |
Pampers Swaddlers Disposable Baby Diapers
About this item
New! Pampers Swaddlers with a new Blowout Barrier that helps prevent up to 100% leaks, even blowouts
Clean-up Strategies That Work
When it comes to changing a poopy diaper, having a set of clean-up strategies can transform an apparent disaster into a smooth, hassle-free experience. Every parent knows that a clean, happy baby is a healthy baby. So let’s equip you with some proven strategies and techniques to ensure your little one stays fresh and rash-free!
Efficient Wiping Techniques To Prevent Rashes
The right wiping technique can make all the difference in preventing discomfort and rashes. Here are foolproof steps to keep in mind:
- Gentle yet effective: Use unscented, hypoallergic baby wipes to gently clean the area. Avoid harsh rubbing.
- Front to back wiping: Always wipe from front to back to prevent bacteria spread, especially in baby girls.
- Pat dry: After wiping, pat the skin dry gently to avoid moisture build-up, which is a breeding ground for bacteria.
- Cotton balls for newborns: For the most delicate skin, dampened cotton balls are the gentlest way to clean up after a change.
Importance Of Thorough Cleaning For Baby’s Health
Maintaining baby’s hygiene with a complete cleanse during a diaper change is critical. Here’s why:
- Prevent Infections: Thorough cleaning eradicates harmful bacteria that can cause infections.
- Avoid Diaper Rash: Removing all traces of stool reduces irritation and prevents diaper rash.
- Urine pH Balance: Clean skin ensures the natural pH isn’t altered by lingering urine, which can lead to skin issues.
How To Handle Unusually Messy Situations
Some diaper changes are more challenging than others. Here’s your action plan for managing even the messiest of situations:
| Step | Action |
|---|---|
| 1 | Lay baby on a large, easy-to-clean surface. |
| 2 | Use extra wipes or a clean washcloth to remove most of the mess. |
| 3 | Employ diaper liners or disposable changing pads for a swift clean-up. |
| 4 | Consider a quick bath if the mess is widespread. |
| 5 | Apply a barrier cream or ointment to protect the skin after a thorough clean. |
Remember, the key to mastering the art of diaper changing is to stay calm, be prepared, and follow a routine that works both for your baby’s comfort and your peace of mind. Armed with these clean-up strategies, you’ll handle any poopy situation with confidence!
Securing The Clean Diaper
Welcome to the “Securing the Clean Diaper” segment of our guide, where you’ll master the art of a perfectly snug diaper for your little one. A proper diaper change not only ensures your baby stays clean and happy, but also prevents inconvenient leaks and discomfort. Let’s ensure your baby is cozy, secure, and ready to go with these simple, follow-along steps.
Ensuring A Snug, Comfortable Fit To Prevent Leaks
Finding the delicate balance between too tight and too loose is crucial for your baby’s comfort and to avoid leaks. Follow these pointers:
- Place the clean diaper under your baby’s bottom, ensuring that the tabs are on the side positioned under your little one.
- Gently pull the front of the diaper up between your baby’s legs and lay it over the belly.
- Check that the waistband rests just under the belly button and the leg cuffs wrap neatly around the thighs, not tucked inside, to prevent spillage.
- Fasten the tabs diagonally across to create a comfortable, yet secure hold.
- Run a finger between the diaper and your baby’s skin to ensure there’s enough room for movement without gaps.
Adjusting Diaper Size And Fit As Your Baby Grows
As your infant blossoms into a bouncing baby, regular adjustments to the diaper’s size and fit become imperative:
- Monitor your baby’s weight and growth patterns, taking note of when they seem ready for the next size up.
- Always choose a diaper that corresponds with their current weight range, as indicated on the diaper packaging.
- Ensure the diaper isn’t too tight by looking for signs of red marks around the waist or thighs.
- If red marks or leaks become frequent, it’s a clear indication that it’s time to switch to a larger size.
| Weight (lbs) | Diaper Size | Fits Babies |
|---|---|---|
| Up to 10 | Newborn | Newborn Babies |
| 8-14 | Size 1 | Infants |
| 12-18 | Size 2 | Older Infants |
Adjusting the fit is not just about upsizing — it’s about making minor tweaks that enhance comfort. For example, loosening the tabs slightly can offer relief when a baby is between sizes, or switching brands that may offer a better fit for your baby’s unique shape.
Equipped with these insights, you’re now ready to tackle diaper changes like a pro! A secure, well-fitted diaper means a happy baby and a happy home.
Wrapping Up Like A Pro
After successfully navigating the delicate operation of diaper changing, the final stage is crucial for hygiene and cleanliness — wrapping up like a pro. Ensuring the poopy diaper is properly disposed of and the surrounding environment is left sanitized are non-negotiable steps in this daily parental task.
Mastery in wrapping up ensures you leave no traces behind. By following these professional tips, you can wave goodbye to the poopy diaper with confidence and maintain a pristine changing environment.
Proper Disposal Of The Poopy Diaper
- Seal it tight: Start by folding the used diaper inward, making sure the soiled area is contained inside. This minimizes odor and prevents any leakage.
- Use a Diaper Sack: For additional odor control, place the folded diaper inside a scented diaper sack or bags designed for soiled diapers to seal off any smells.
- Secure the Trash: Keep a designated diaper pail or a trash can with a tight-fitting lid to prevent pets and toddlers from accessing the contents. Make sure to dispose of the diaper in this dedicated bin.
- Outdoor Disposal: If the situation allows, dispose of the tightly sealed diaper sack in an outside trash bin to further eliminate the chance of odors lingering in your home.
- Regular Emptiness: Prevent buildup by regularly emptying the diaper pail or trash can, ideally on a daily basis.
Sanitizing Hands And The Diapering Area Post-change
Hygiene is paramount. Be earnest in sanitizing your hands and the diapering area after each change to ensure the safety and well-being of both you and your baby.
| Hands: | Immediately after the disposal, wash your hands with soap and water for at least 20 seconds. If soap and water are not available, use an alcohol-based hand sanitizer with at least 60% alcohol concentration. |
| Changing Surface: | Wipe down the changing table or mat with a disinfectant wipe or spray, and allow it to air dry. In case of any spillage, ensure thorough cleaning is done to prevent any bacteria from breeding. |
| Reusable Items: | Cloth diapers or any fabric used in the process should go straight into a sealable wet bag and then into the washing machine, using a hot water setting. |
Note: Always keep a stash of disinfectant wipes and hand sanitizer near the changing station for quick and effective clean-up.
Soothing And Reassuring Your Baby
Diaper changes can be a challenging time for both babies and parents. A poopy diaper isn’t just about the clean-up; it’s also about keeping your little one comfortable and calm throughout the process. Babies can sense stress and discomfort, which is why soothing and reassuring them during a diaper change is crucial. A calm demeanor helps maintain a peaceful environment, making the experience more pleasant for everyone involved.
Tips For Keeping The Baby Calm And Contented Post-change
- Maintain gentle eye contact and offer a soothing voice to reassure your baby.
- Have a special toy or pacifier nearby to give them immediately after the change.
- Use a comfortable changing pad with a warm and cozy surface.
- Softly sing or hum their favorite lullaby to keep the atmosphere serene.
- Ensure the room is at a warm temperature to prevent any discomfort from the cold.
Incorporating Play And Comfort Right After Diapering
After wiping away the mess, it’s a beautiful moment to strengthen the bond with your baby. A diaper change can seamlessly transition into playtime or cuddles, turning a routine task into an opportunity for connection.
Consider the following to make post-diapering a delightful time:
| Activity | Benefits |
|---|---|
| Tummy Time | Encourages physical development and strength. |
| Cuddling | Provides comfort and enhances emotional bonding. |
| Interactive Toys | Stimulates the senses and fine motor skills. |
| Baby Massage | Promotes relaxation and may help alleviate gas discomfort. |
Frequently Asked Questions On How To Change A Poopy Diaper
What Materials Do I Need For Diaper Change?
Before changing a poopy diaper, you’ll need a fresh diaper, baby wipes, diaper rash cream, and a diaper disposal system. Having everything at hand makes the process smoother and quicker.
How Do I Clean Up A Baby After Pooping?
Gently wipe the baby’s bottom front to back using baby wipes. For stubborn messes, you may need extra wipes or damp washcloths. Be sure to clean all creases and apply diaper cream if necessary.
Can Diaper Changes Cause Diaper Rash?
Frequent diaper changes help prevent diaper rash by keeping the skin dry. However, if left unchanged, the moisture and bacteria in a poopy diaper can contribute to rash development.
What’s The Safest Way To Dispose Of A Poopy Diaper?
Wrap the soiled diaper tightly to contain the mess and odor and use a diaper disposal system or a sealed bag before tossing it in the trash. This ensures hygiene and reduces odor.
Conclusion
Changing a poopy diaper is a skill all new parents master over time. With the right supplies and a calm approach, it becomes second nature. Remember to prioritize hygiene and comfort—for both you and your baby. Conquering this task paves the way for a clean, happy, and healthy child.
Keep practicing; you’ve got this!
