What are the benefits of sensory bins for 3-year-olds?
Budget-friendly sensory bins for 3-year-olds have many benefits. They help kids explore their senses. They also improve fine motor skills. These bins support language development and boost thinking skills. Kids get to be creative and solve problems too. Plus, they help with managing emotions through touch and feel experiences.
Key Highlights
- Sensory bins are great for learning and fun for toddlers.
- Use simple and cheap materials like dry rice and beans to engage your child’s senses.
- Help them explore and grow by adding tools like scoops, cups, and tongs.
- Make safety a priority by choosing age-friendly and safe items.
- Keep it easy! Begin with one or two types of sensory bin fillers and tools.
Introduction
Sensory play is a fantastic way to help your 3-year-old learn and grow. One fun option is to use sensory bins! If you are a parent using sensory bins for the first time, it can feel a bit scary. But it is really simple and inexpensive. Let’s explore how to create fun and exciting sensory bins that will keep your child busy for hours!
Understanding Sensory Bins for 3-Year-Olds
Sensory bins are simply containers that hold various materials to help a child use their senses. These bins create a safe place for toddlers to feel different textures, see shapes, observe colors, and hear sounds. You can picture them as tiny playgrounds for little hands and curious kids.
For 3-year-olds who enjoy touching and playing, sensory bins are not only entertaining but also very helpful. They aid in learning and development. They can improve creativity, help with problem-solving, build language skills, and enhance fine motor skills.
The Importance of Sensory Play in Early Childhood Development
Sensory play is essential for young children’s development. When kids engage in sensory play, they feel and explore their surroundings. This experience helps build connections in their brains. These connections support their learning, speech, and movement skills.
Sensory bins can really help kids with their fine motor skills. In the bins, children scoop, pour, dig, and handle various objects. This activity strengthens the small muscles in their hands and fingers. These muscles are important for tasks like writing, drawing, and buttoning shirts.
Sensory bins are great for improving problem-solving skills. When kids feel different objects and textures, they begin to explore. They learn how to use tools. They might also solve easy puzzles or make fun storylines.
What Makes a Good Sensory Bin?
Safety should always come first when creating a sensory bin for your toddler. Check all materials for small parts that could be a choking hazard. Ensure everything is safe, non-toxic, and right for their age.
A nice sensory bin uses many senses. It includes different textures, colors, and even smells. The goal is to make an exciting experience that catches your child’s attention and keeps them interested.
A good sensory bin can spark curiosity and encourage exploration. It should allow your child to play freely with the materials. This way, they can use their own creativity and imagination.
Beginner’s Guide to Setting Up Your First Sensory Bin
Creating your first sensory bin can be simple. You need just a few basic supplies and some imagination. This can result in a fun time for your 3-year-old. Just keep it easy. Use safe and appealing materials. Follow these simple steps:
Essential Supplies and Where to Find Them on a Budget
You don’t need to spend much money on sensory items. There are many things in your home that you can use for sensory play.
Here are some ideas that are easy on the wallet to help you get started:
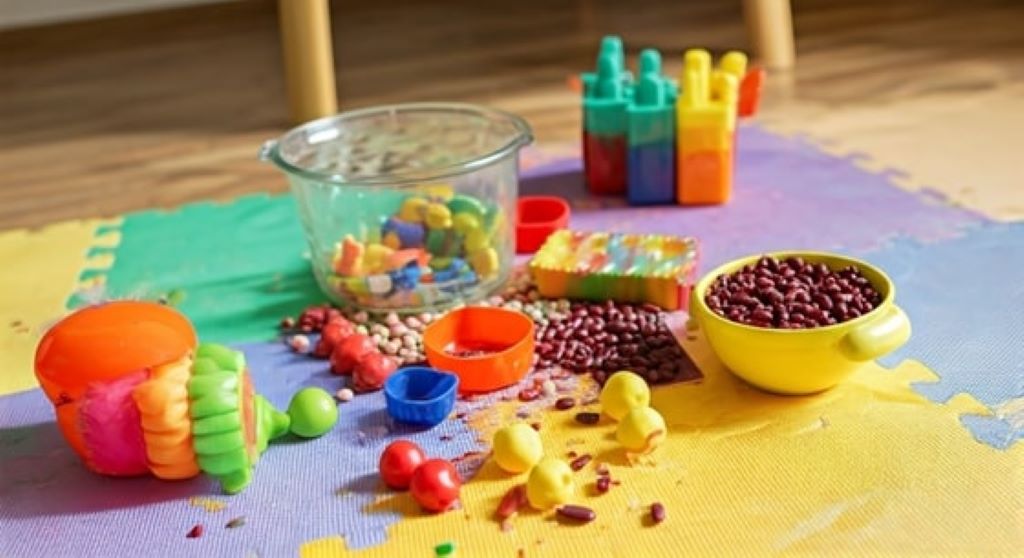
- Container: A large, flat plastic bin or a cookie sheet is great to use.
- Fillers: You can use dry rice, beans, pasta, oats, sand, or water. You can find these at your grocery store or in your pantry!
- Tools: Scoops, measuring cups, spoons, tongs, and small toys can make it more fun. Check your kitchen drawers or look in dollar stores for cheap items.
You can find great deals on sensory bin fillers and tools on Amazon. You can also check discount stores like Walmart or Target. Be creative and look for different items for your supplies!
Selecting Safe, Affordable Materials for Sensory Exploration
When you choose materials for your sensory bin, safety must be the top priority. Ensure that all items are safe and will not cause choking hazards. This is very important for younger toddlers because they often like to put things in their mouths.
- Pick bigger items that are hard to swallow.
- If you use small items like beads or buttons, keep a close eye on your child while they play.
- There are many safe and budget-friendly natural materials to try out.
You can put pinecones, leaves, rocks, or large shells into your sensory bin. These natural items create fun sensory experiences. They can help your child learn about the world around them.
Step 1: Choosing the Right Container
The first step to create your sensory bin is picking the right container. It should be shallow so kids can reach into it easily. However, it also needs to be big enough for fun playtime. A large plastic bin or a cookie sheet is a good choice. They help hold the materials and keep the mess to a minimum.
If you want to create a water-based sensory bin, a water table or a large plastic storage container works well. You can also be creative and choose any container you like!
If you want a fun project, consider creating a DIY sensory bin using a cardboard box or an old tire. Make sure to clean the container thoroughly. Also, check that it is safe for your child to use.
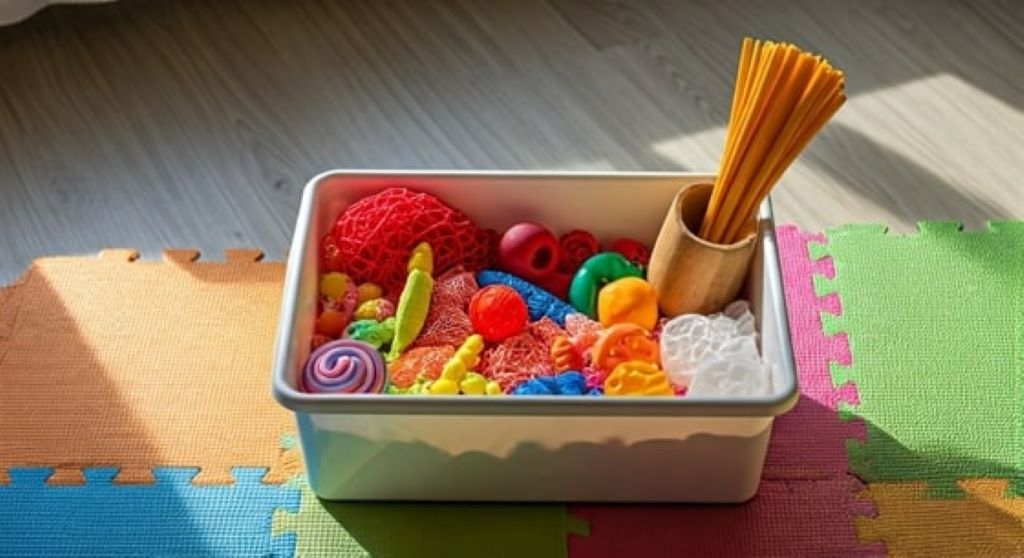
Step 2: Filling Your Bin with Budget-Friendly Sensory Materials
Now for the fun part – filling your bin with sensory materials! You can be creative without spending much. Here are some low-cost options you can use for sensory bases:
- Dry Rice: This is a popular option. You can use food coloring to add bright colors.
- Beans: Various types create unique textures and sounds.
- Pasta: It’s great for games like scooping, pouring, and sorting.
- Oats: They provide a calming and soothing sensory experience.
- Choose materials that are safe.
- Make sure they are suitable for your child’s age.
- Let your child explore freely.
Step 3: Adding Tools and Toys for Enhanced Learning
You can start by setting up your sensory bin. After that, add different tools and toys. These will help your child learn and play. Pick tools that will support their fine motor skills.
Tongs are excellent tools. They help make hand muscles stronger. They also improve hand-eye coordination. Scoops, spoons, and measuring cups let your child scoop and pour. This practice helps with hand-eye coordination and spatial awareness too.
You can get creative by adding small toys to the sensory bin. Things like little animal figures, cars, or blocks can help with storytelling and spark your imagination.
Conclusion
In conclusion, making sensory bins for 3-year-olds is fun and cheap. You can use safe and low-cost items to help your child learn and grow. Pick suitable containers and fill them with interesting sensory materials. It’s also good to include tools that help with learning. Creating sensory bins encourages your child’s senses and sparks their creativity. Start building your first sensory bin today. Your child will enjoy this exciting and educational playtime.
Frequently Asked Questions
What are the best materials to use in a sensory bin for toddlers?
The best things to use in toddler sensory bins are fun, safe, and good for their age. Some great choices are dry rice, beans, pasta, oats, and water. Make sure the items are large enough so they can’t choke on them. Always keep an eye on your child while they play with these materials. You can also use fillers like cooked spaghetti to add a new feel.
Read More:
12 Baby Products That Saved Sanity in the First Six Months
Baby’s Got the Sniffles? Tips to Keep Your Little One Healthy!